Protecting your family from the dangers of radon gas is an important, yet often overlooked task for homeowners. Radon gas is odorless and colorless, making it hard to detect without specialized equipment. Fortunately, installing a radon mitigation system can help keep your family safe by reducing the levels of radon in your home.
These are the steps you’ll go through (or a contractor) when installing a radon mitigation system:
- Step 1 – Choose a Location
- Step 2 – Cut Through the Wall
- Step 3 – Install the Radon Vent Pipe and Fan
- Step 4 – Connect Power to The Fan
- Step 5 – Drill Through the Slab
- Step 6 – Remove Soil
- Step 7 – Connect the Outdoor Vent Pipe Down to The Slab Hole
- Step 8 – Final Caulking and Cleanup
- Step 9 – Perform a Final Radon Test
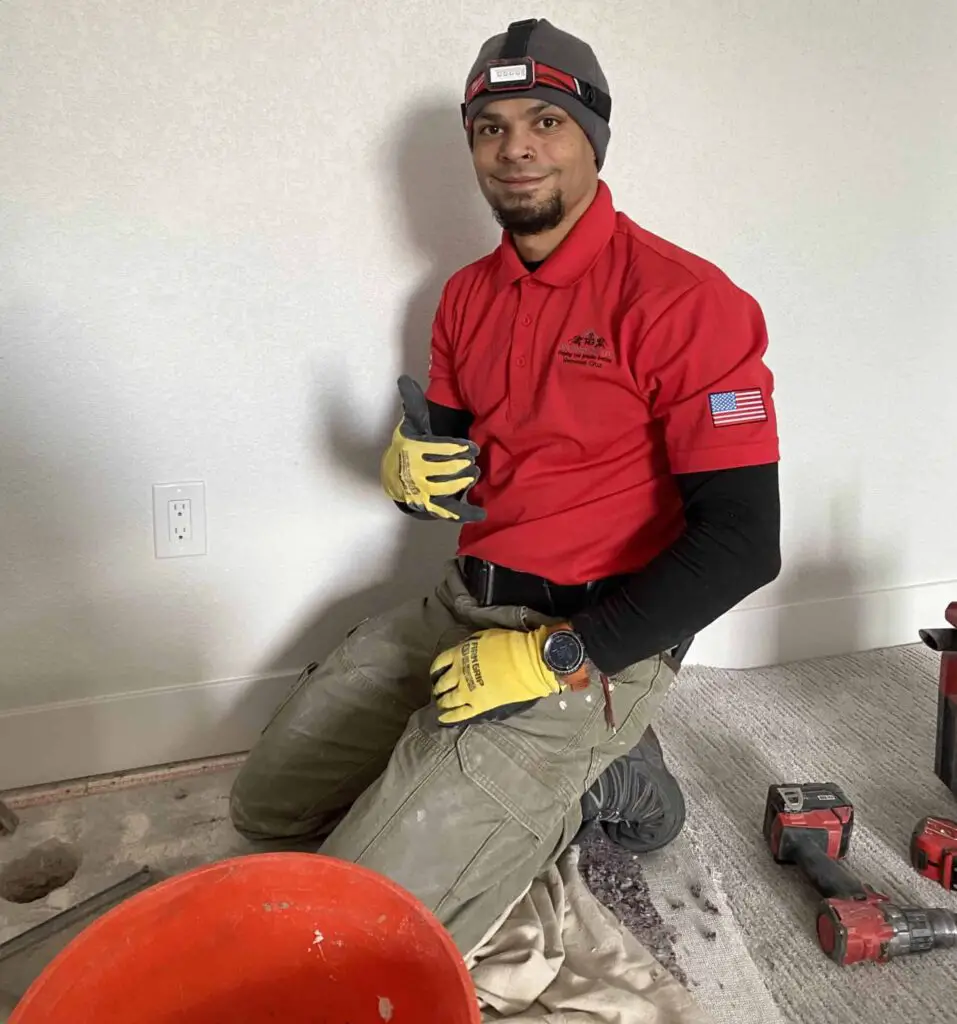
We’ve shadowed Geovanni “Kratos” Cruz, owner of The Radon Guy LLC in Denver, Colorado to get you detailed step-by-step instructions and tips for the entire process.
Step 1 – Choose a Location
Choosing the right location for your radon mitigation system is critical to its success. You’ll need to find a spot near an exterior wall on the lowest floor of your home, preferably in a hallway or closet.
This is where you’ll cut a hole in the wall and install the pipe that will vent radon gas away from your living area.
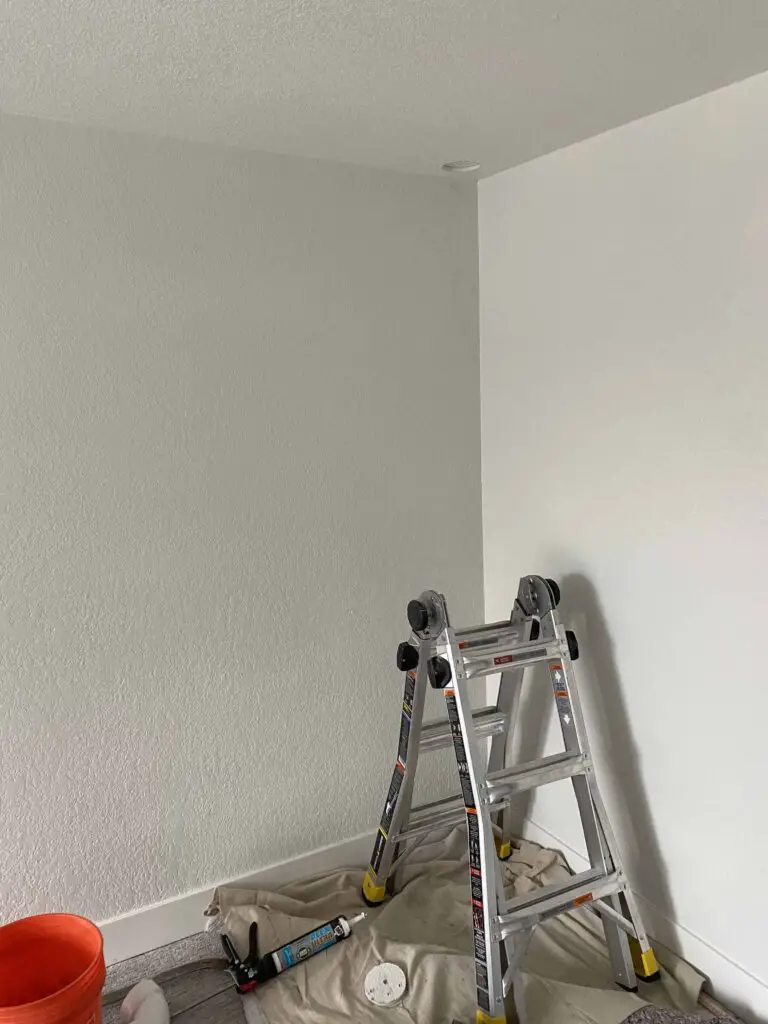
For optimal results, you should also make sure that the area is not over the foundation footers. An easy way to avoid that is by always choosing a location that’s at least 8-12 inches away from an outer wall.
Lastly, you’ll want to avoid any utilities that are running through the outer wall such as electrical, plumbing, and heating.
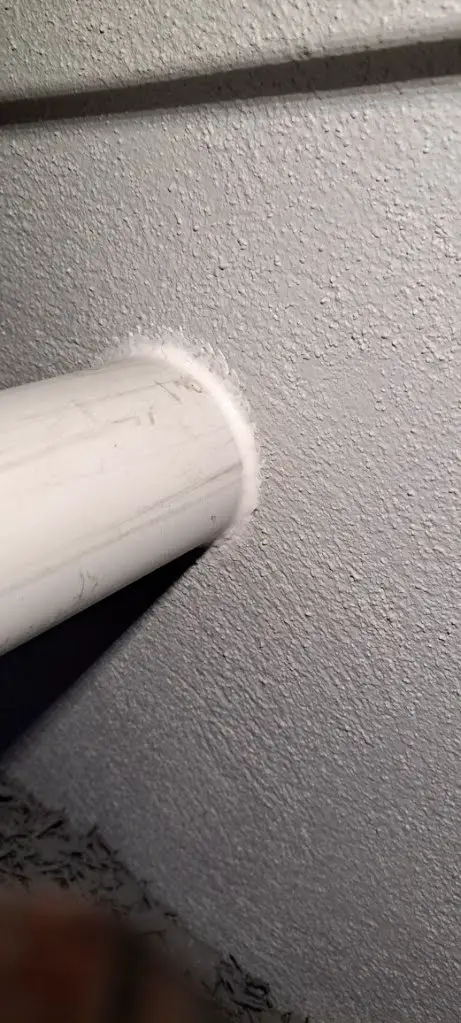
Step 2 – Cut Through the Wall
Before you start cutting through the wall, make sure to turn off your electricity and gas appropriately. You don’t want any surprises after you’ve cut!
Once all of that is taken care of, use a 4-inch hole saw and carefully cut a 4-inch diameter hole in the exterior wall near where you’ve chosen for your radon mitigation system.
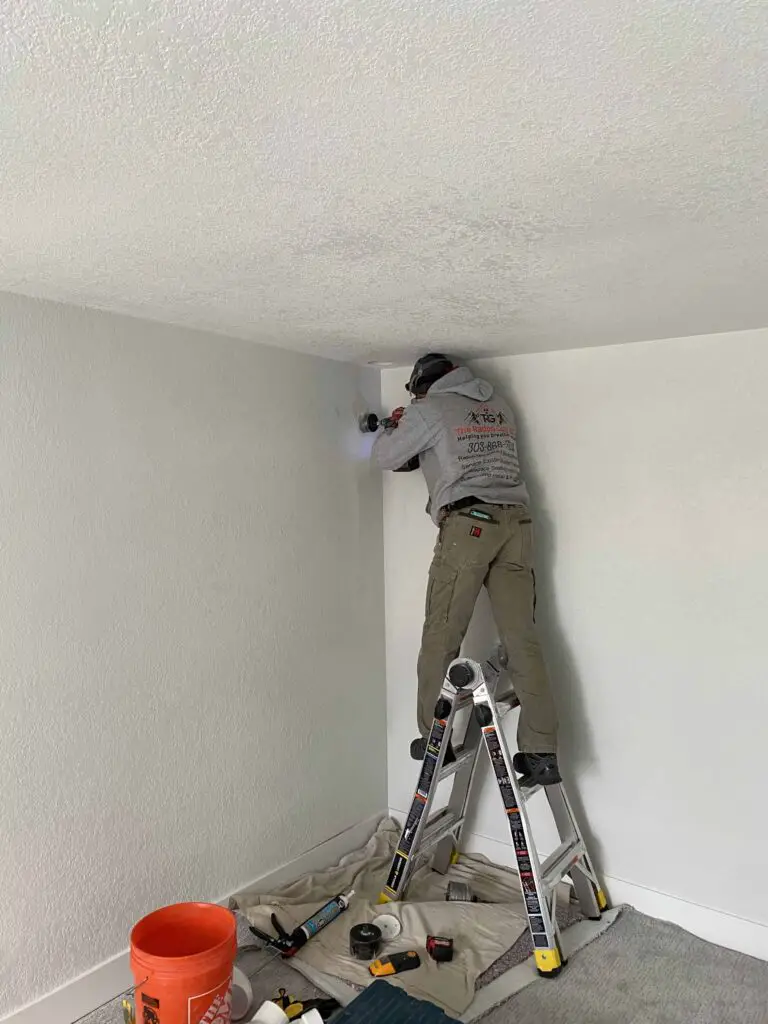
Sometimes you’ll need to core through the outer wall of cinder blocks are involved. This is best done from the outside.
After the hole is complete, clean up any excess dust and debris that may have been created during the process.
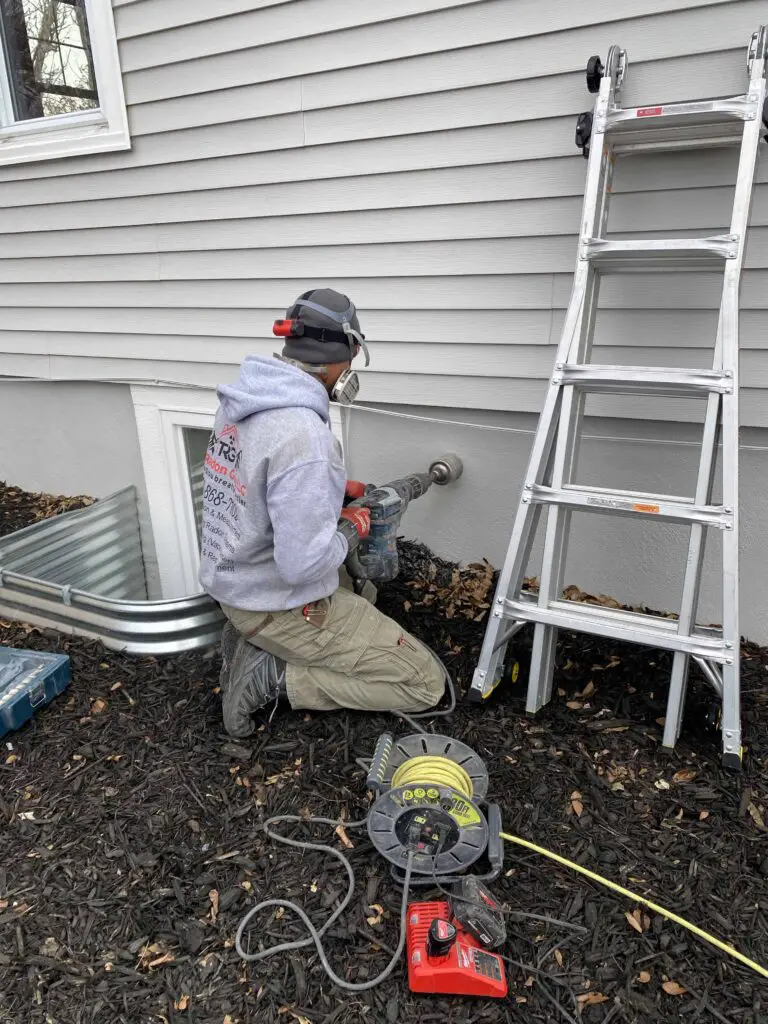
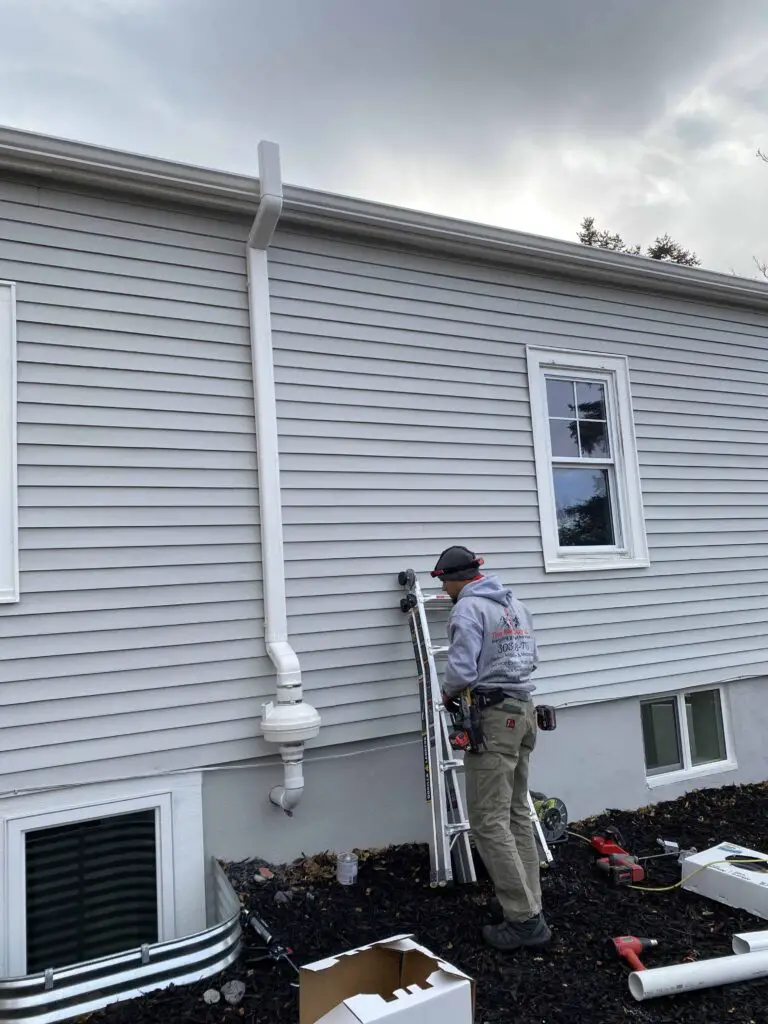
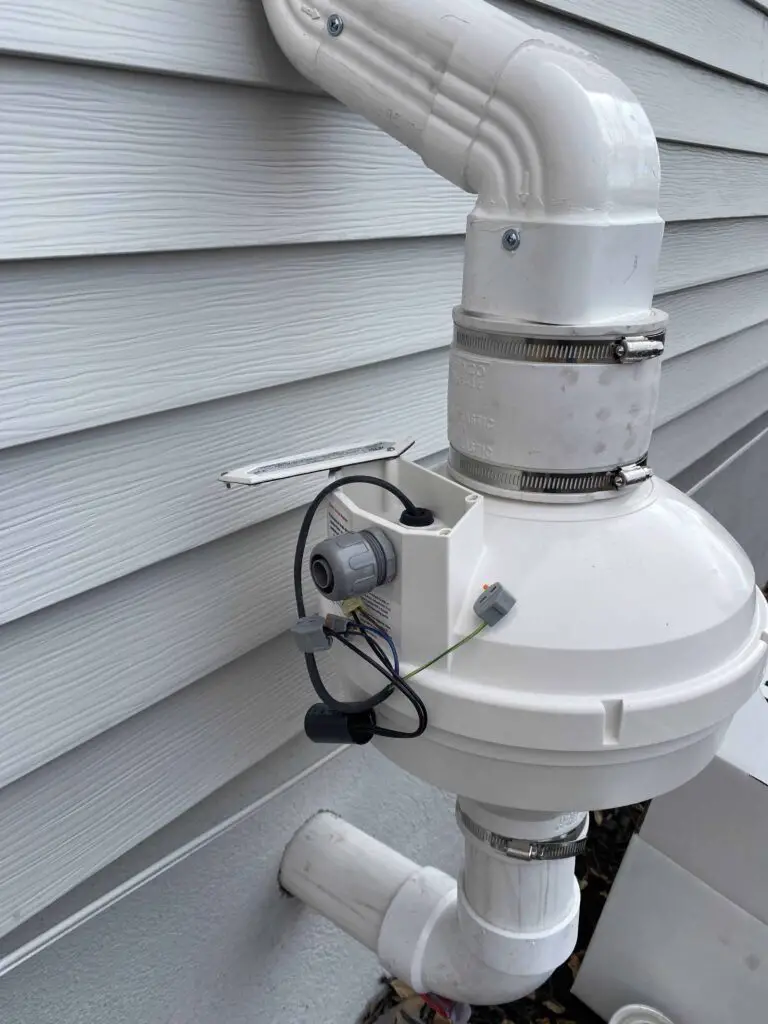
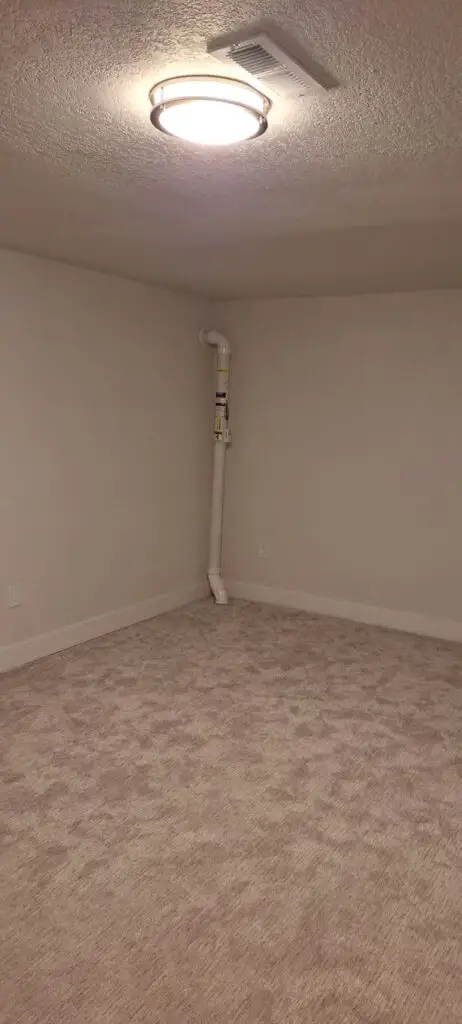
Step 3 – Install the Radon Vent Pipe and Fan Outside
Before doing anything else inside the home, you’ll need to attach the radon vent pipe outside.
First cut and slide in the pipe through the wall cut and attach a 90-degree elbow bend.
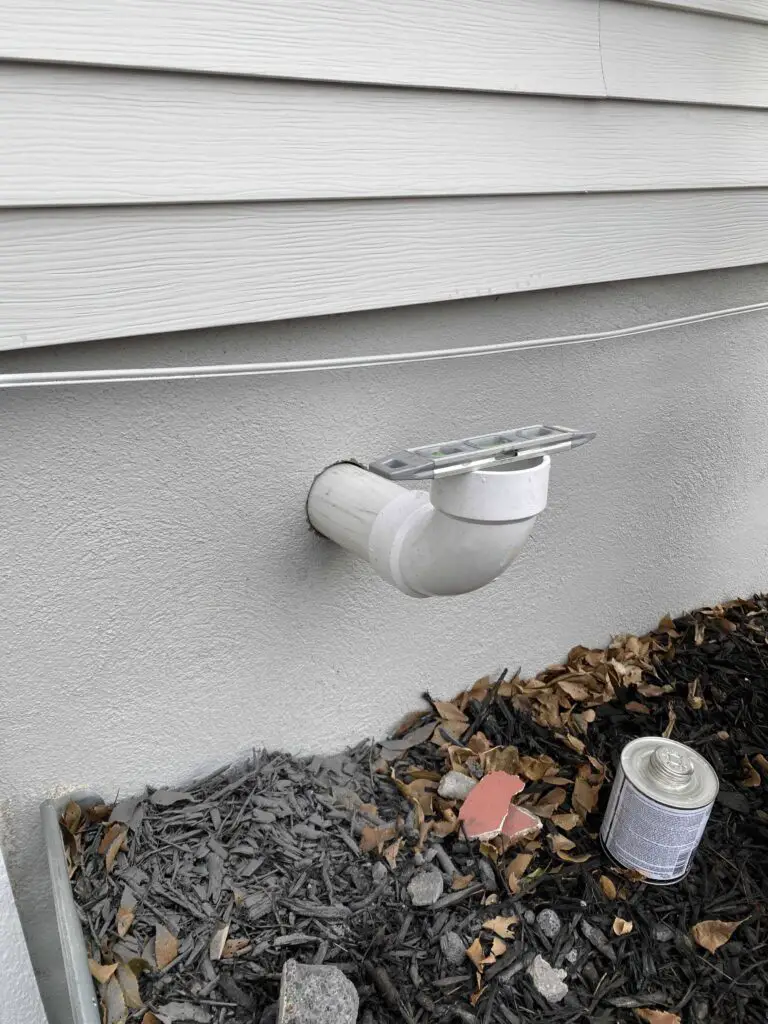
Next, attach the fan.
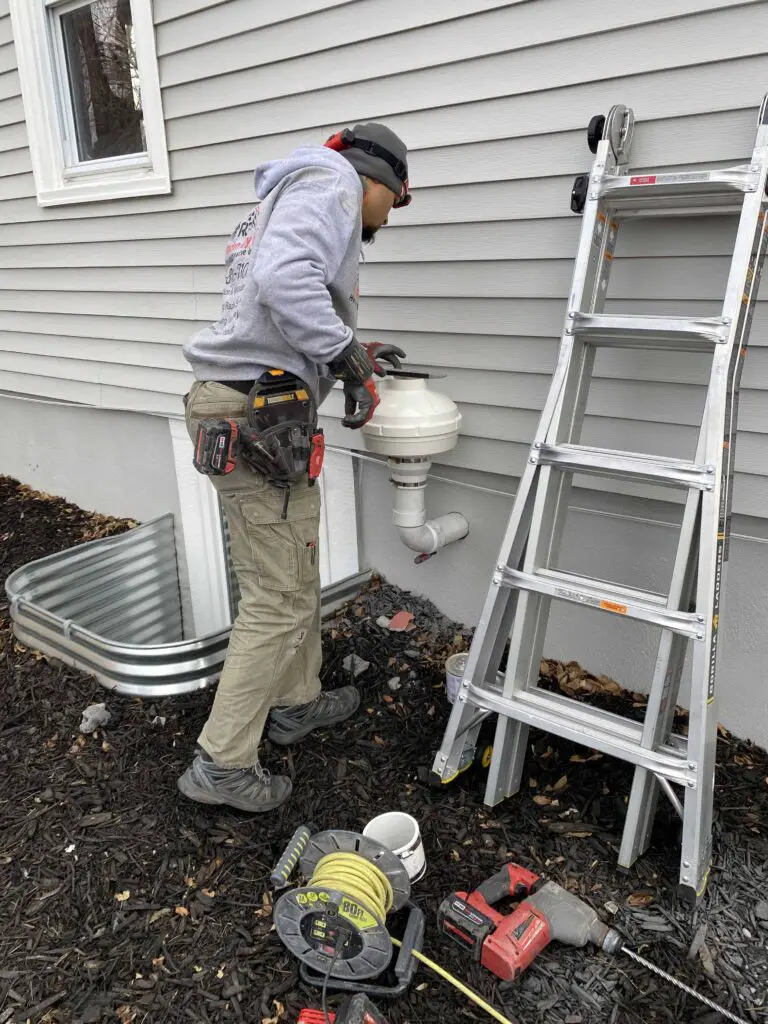
Lastly, finish adding vent pipe from the top of the fan, up along the wall, then up and over any gutters.
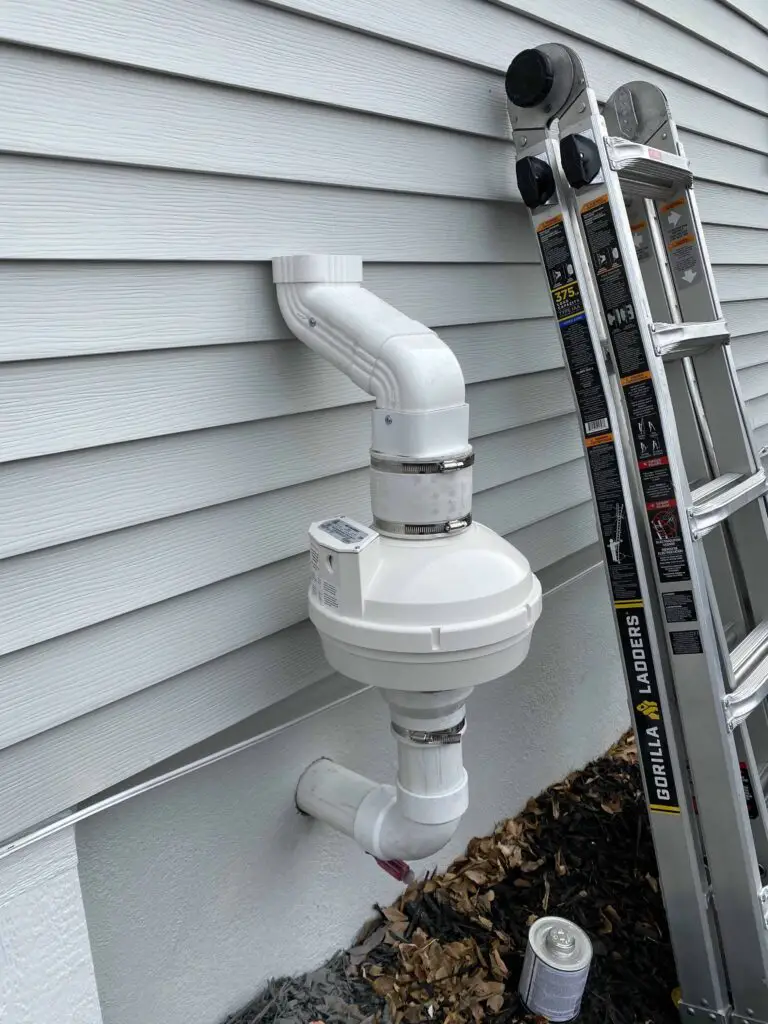
Fan Saving Tip – Caulk Connects to Prevent Condensation Dripping On the Fan
Adding a caulking sealant around the connections between the vent pipe and fan is an often overlooked way to save energy and extend the longevity of your radon mitigation system. The caulking creates an air-tight seal, preventing condensation from dripping onto the fan and potentially shorting it out. It also helps to keep hot or cold air from entering your home, saving you money on energy bills.
Step 4 – Connect Power to The Fan
Now that the fan is installed, you’ll need to hook up the power.
To do this, you’ll run an electric line from a nearby outlet or junction box.
Ideally, this would be outside the home but often you may need to drill through the wall and connect to an indoor outlet.
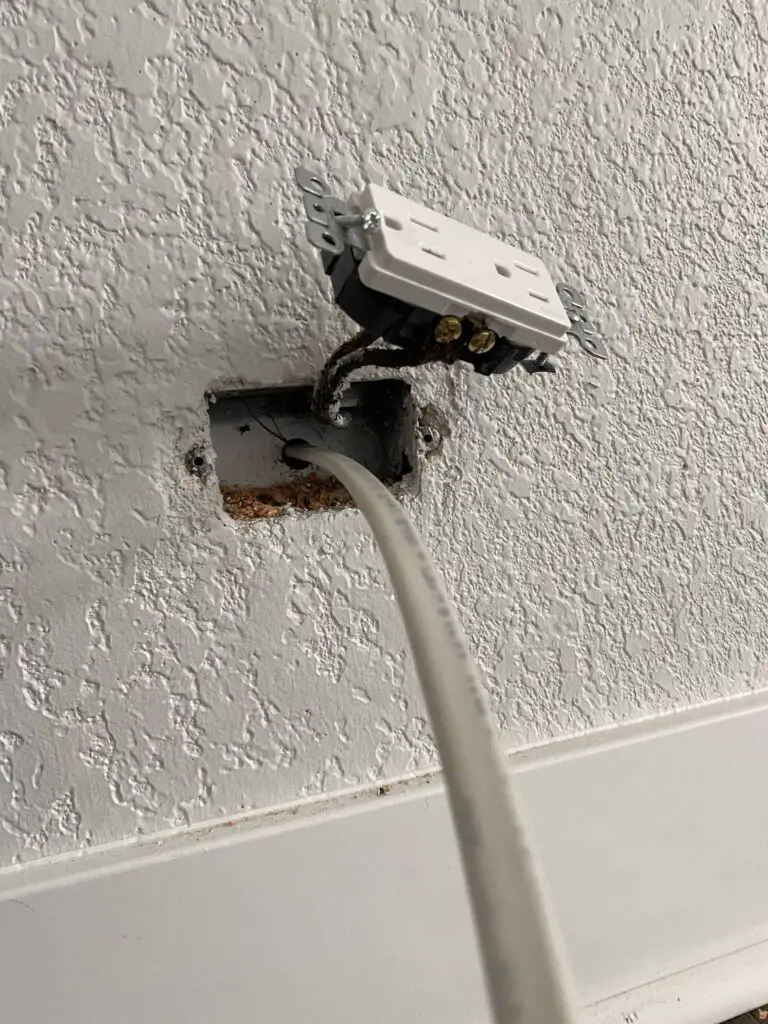
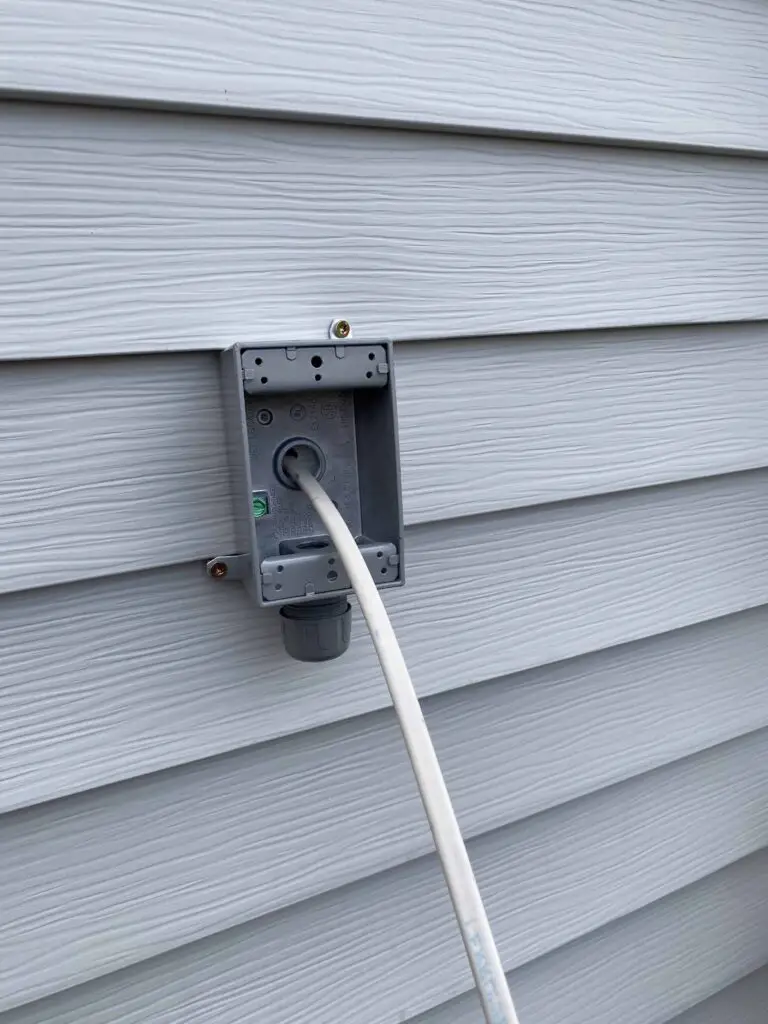
Make sure that all connections are sealed properly and that the fan is grounded correctly.
Step 5 – Drill Through the Slab
Once the fan is connected to the power source, you’ll need to drill a hole through the slab foundation.
As discussed above, this should be at least 8 inches away from an outer wall to avoid any foundation footers.
You’ll use a 4-inch hole saw for this with a hammer drill.
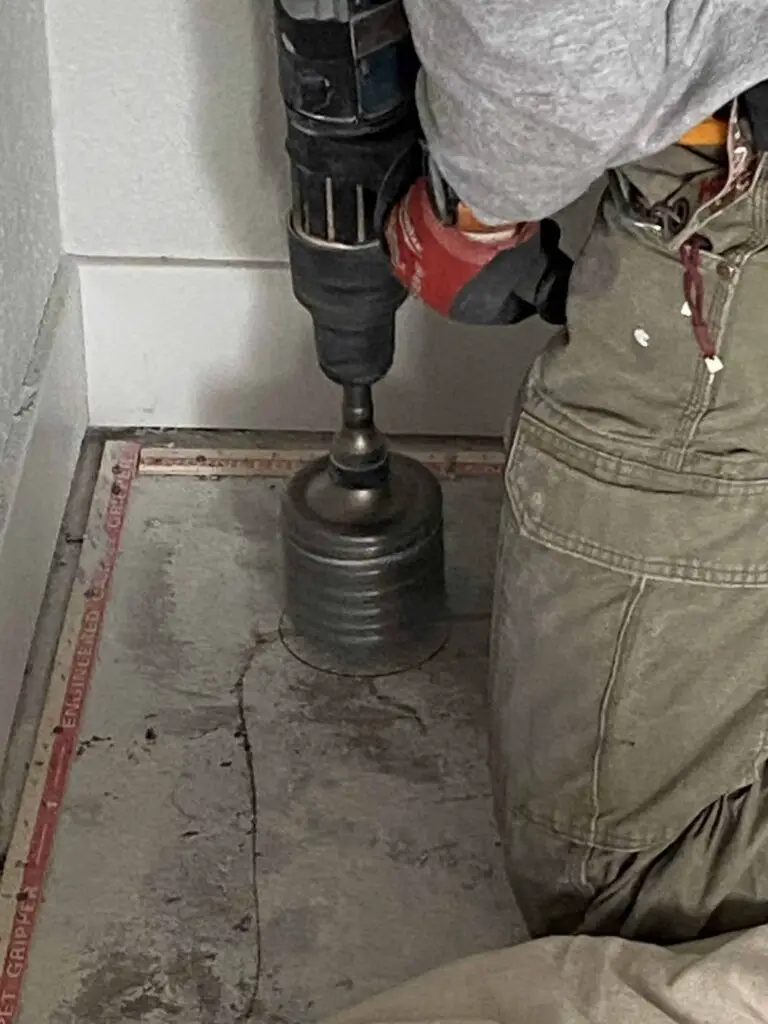
Drillbit Saving Tip – Use Smaller 1/2″ Drill Bits First Before Using a 4″ Hole Saw
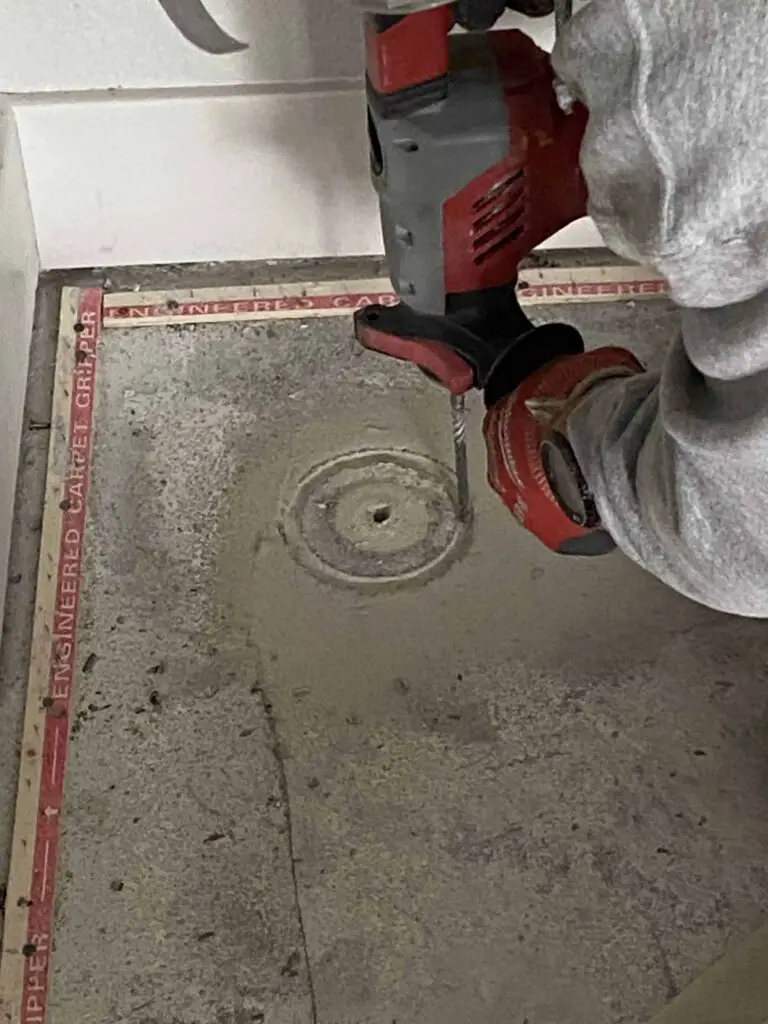
Use a 1/2″ drill bit to cut small holes around the edge of the circle you plan to cut. Smaller drill bits like these cost less than $30 but a hold saw can easily cost over $300. By starting with these smaller holes you’ll greatly extend the life of your hole saw drill bits.
Also, the smaller drill bits will help you confirm you haven’t chosen a location over a foundation footer. You should easily feel the drill bit hit softer soil 4-6 inches underneath the slab.
If you feel a small gap then resistance you could be hitting the footer and you should move the hole location a few more inches away from the wall.
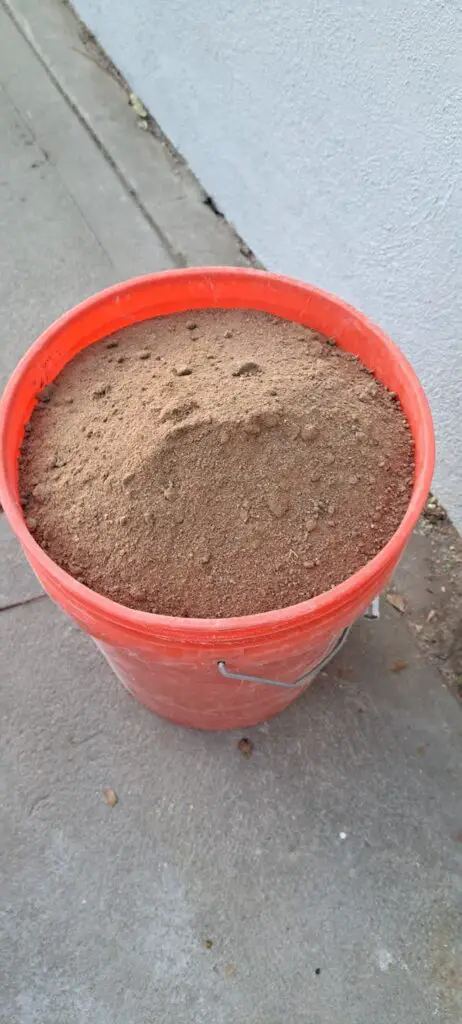
Step 6 – Remove Soil
Next, you’ll need to remove the soil underneath the slab in the area where you’ve drilled. This creates a vacant space for air to accumulate so that the fan pulls from under the slab.
Get rid of dirt with a combination of the manual removal, digging using a crowbar or similar tool, and using a shop vac.
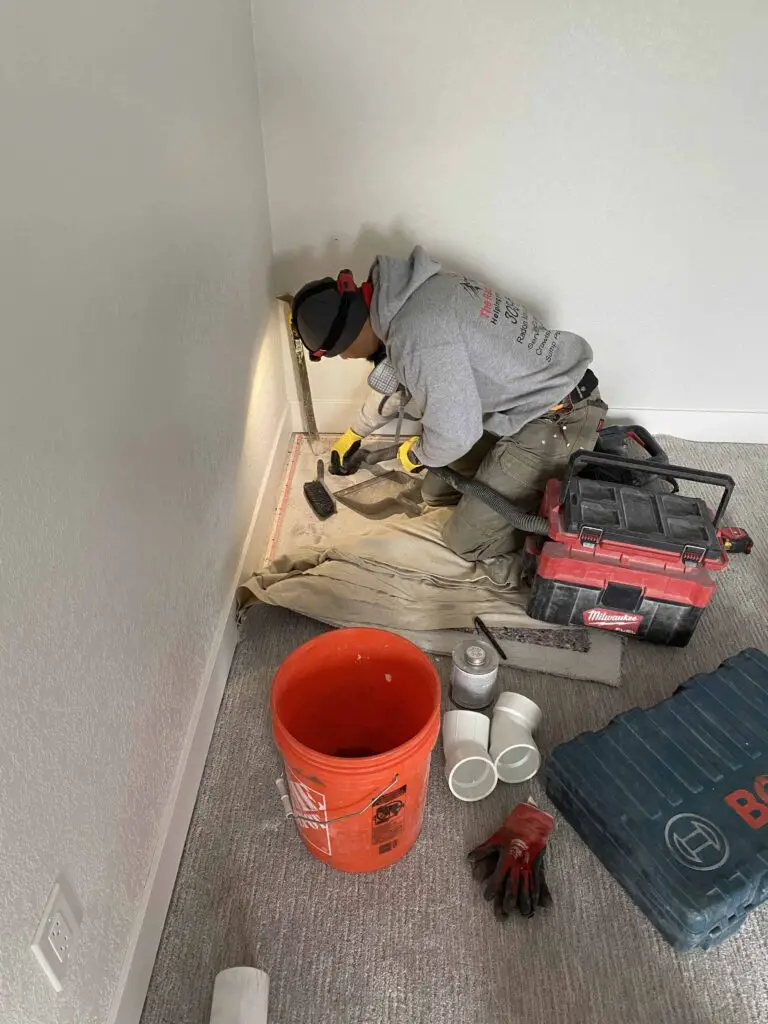
For loose sandy or gravelly soils remove at least 5 gallons of soil. For clay or tight-packed soils remove at least 15 gallons.
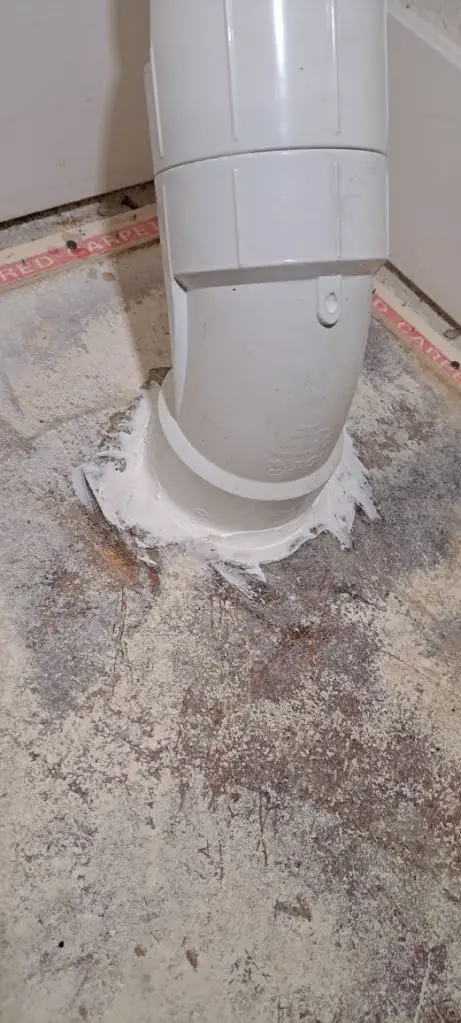
Step 7 – Connect the Outdoor Vent Pipe Down to The Slab Hole
Once the soil has been removed, connect the vent pipe to the hole in the slab.
Secure with a foam sealant or masonry caulk at this connection.

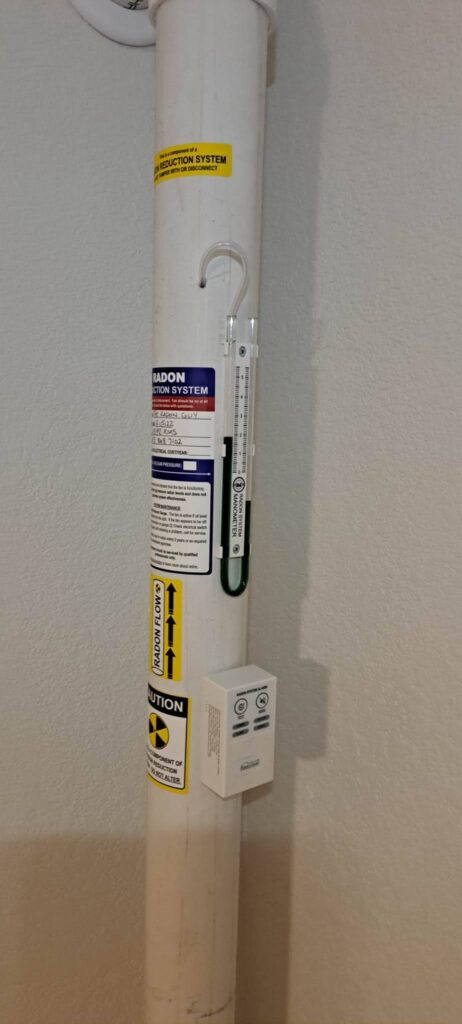
Install a manometer and airflow warning device. This device will set off an alarm whenever it detects that airflow is not passing through the pipe.
The manometer will give you a quick visual check that the pipe is pressurized and moving air from the sub-slab outside the house.
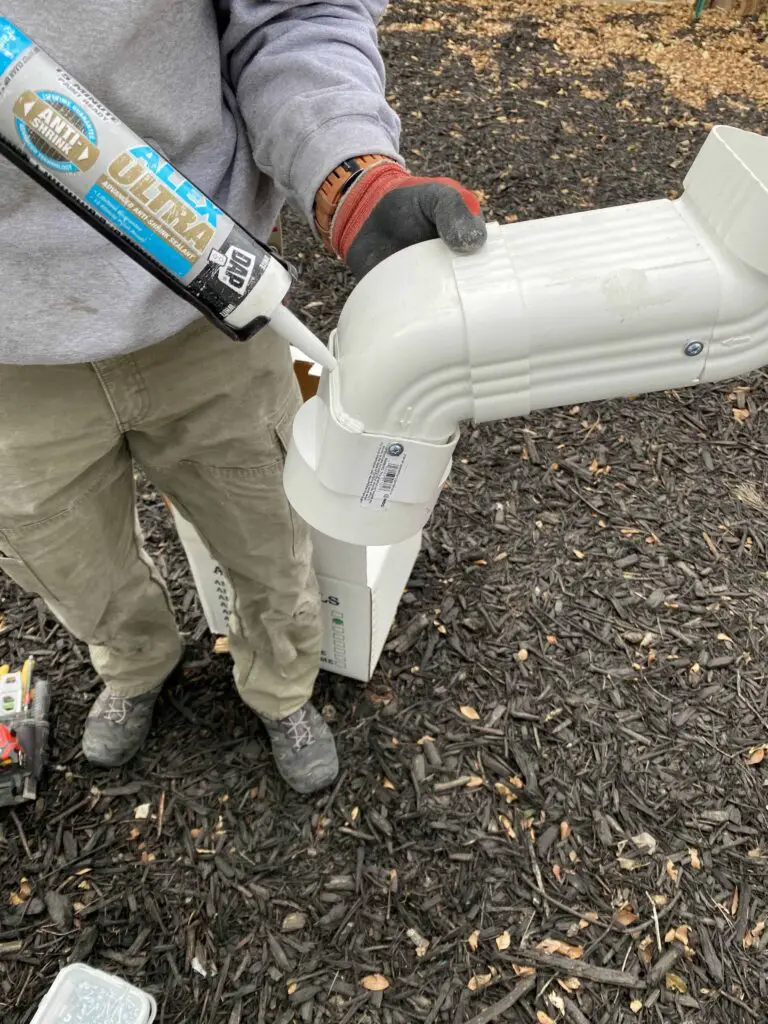
Step 8 – Final Caulking and Cleanup
To finish the installation, caulk all pipes at their connection points and anywhere else that air can escape. This will help ensure a tight seal and efficient operation of your radon mitigation system.
Clean up any remaining dust or debris to complete the project.
Step 9 – Perform a Final Radon Test
Finally, it’s important to test your radon levels after installation to make sure the system is working correctly.
You can do this with a home radon test kit, which you can find at your local hardware store or online.
Perform the test following the instructions included in the kit, and record your results for future reference.
The EPA standard for radon is 4 pCi/L, so if you find your levels to be higher than that you may need to adjust the operation of your system.
You can also contact a professional radon mitigation specialist for further assistance.
Congrats! You’ve now successfully installed a radon mitigation system in your home. With regular monitoring and maintenance, this system will help keep your home and family safe from radon gas for years to come.
Thank you for reading this step-by-step guide and thanks to Kratos for allowing us to shadow him, learn from the best, and take photos of every step.
If you’re lucky enough to live in the Denver area you can hire Kratos, the Radon Guy, to do your installation for you.
You can contact Kratos at theradonguy@yahoo.com or 303.868.7102.
FAQ
Should You Hire a Radon Mitigation Installer?
Absolutely! Radon mitigation installers are highly trained professionals who can assess your home for the presence of radon and then design, install, and maintain a system specifically tailored to your needs.
Hiring a qualified radon mitigation installer is essential to ensure that you are protecting yourself and your family from the health risks associated with elevated levels of radon found in many indoor environments.
A certified radon mitigation installer will evaluate several factors when initially assessing your home such as local geology; building construction materials; venting options available; overall permeability of structure’s foundation(s); ventilation rates within the dwelling; sources for external air supply (mechanical fan/piped outside air); electrical supplies (where appropriate); etc.
They will then make suggestions concerning which type(s)of mitigation technique may be most suitable given the circumstances faced by each homeowner – no two homes’ being identical due to both their structural requirements & environmental conditions present upon them within immediate vicinity thereof – thus ensuring maximum efficiency obtained at minimal cost out playable over time since their services guarantee adequate results achieved too!
Are DIY Kits Available for Radon Mitigation Installation?
DIY kits for radon mitigation installation are often available but should be used with caution. Radon is a colorless, odorless gas that can cause serious health risks if ignored, so proper installation of any radon reduction system is essential.
Radon mitigation systems cannot be installed quickly or easily without appropriate training and knowledge of the construction industry standards and regulations. While DIY kits can come in handy to get started on the project, professional contractors should always be consulted before beginning this kind of work as incorrect installations may result in dangerous levels of radon in the home environment.
If you decide to try a DIY kit for your radon mitigation installation, make sure it follows guidelines developed by the American Society for Testing and Materials (ASTM) and other relevant organizations like National Safety Council (NSC). Additionally, ensuring proper procedure from start to finish is crucial; exhaust fans need to be sized correctly while working within local building code requirements at all times (i.e., not committing hazardous wiring alterations).
Overall, purchasing a DIY kit may appear easier than hiring an expert contractor but without consultation from someone knowledgeable about local building codes and ASTM guidelines – you might end up doing more harm than good!
A qualified professional contractor will ensure long-term safety due to their experience working with locally approved equipment; therefore we highly recommend this route instead if possible!
How Much Soil Should I Remove Underneath the Slab?
The amount of soil that needs to be removed depends on several factors including the type of soil, size of the area, and overall landscape slope. Generally speaking, for loose sandy or gravelly soils at least 5 gallons should be removed underneath the slab. For clay or silty soils (which are denser), around 10-15 gallons should be removed to create an effective radon barrier. The depth of removal will depend on your local building code but typically runs from 18 inches to 24 inches below grade.
How Can I Tell if My Radon Mitigation System Is Working Correctly?
After installation, a radon test should be performed to verify if the system is working correctly. The test should be conducted for at least 48 hours to get an accurate reading. The results should be compared with the EPA’s action level of 4 pCi/L to determine if the system is effective in reducing radon levels. If the reading is above 4 pCi/L, action should be taken to adjust the system or contact a professional for further assistance.
How Often Should I Test for Radon?
After the installation and first successful test of your radon mitigation system, follow-up tests should be conducted about every two years. This helps to ensure the system is still working correctly and that levels of radon gas in the home remain sufficiently low. Additionally, a yearly test is recommended if any changes are made to the structure or other factors that could affect indoor air quality.
Can I Paint Over the Pipes of My Radon Mitigation System After It’s Installed?
Yes, you can, however, it is not recommended. The pipes of your radon mitigation system should be left visible and accessible for maintenance purposes. Painting or otherwise covering the pipes may interfere with its effectiveness and could compromise safety levels. Additionally, covering up any warning labels or other important information on the device could lead to confusion in case of an emergency.